
Innovative Equipment Engineered to Last
Discover Barreto Manufacturing's 40 years of innovative, durable landscaping equipment, along with expert tips and local highlights for your projects.
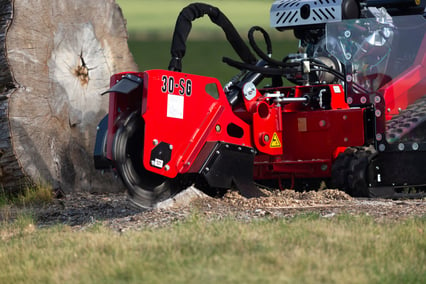
Maintaining the teeth on your stump grinder is crucial to keeping your stump grinder in tip-top operating condition. Inspection and replacement should be a part of your regular maintenance routine.
Barreto Stump Grinders are factory equipped with Greenteeth LoPro® pockets and Greenteeth Wearsharp® cutter teeth. We offer these sets in 500, 700, and 900 series. These cutter teeth are equipped with three cutting edges, allowing for increased longevity. The following instructions will illustrate how to rotate and replace these teeth to take advantage of each cutting edge.
-
Tools Needed
-
Greenteeth® Components
-
Recognizing Wear and Damage
-
Rotating or Replacing the Teeth
-
Replacing Pockets and Tooth Configuration
-
Torque Specifications
Tools Needed
- ½” Wrench (500 and 700 series)
- ⅝” Wrench (900 series)
- Heat gun (For pocket replacement)
- ½ Hex drive (for pocket replacement)
- Red Loctite (for pocket replacement)

If you are visibly noting wear (chipped or broken teeth, rounded edges), or noticing decreased performance from your Wearsharp® teeth, it is a good indication it is time to rotate them. Due to the high wear nature of these parts, and the vibration they are subjected to, we recommend you inspect your teeth after each use and check all fasteners weekly at a minimum.
Greenteeth® Components
-
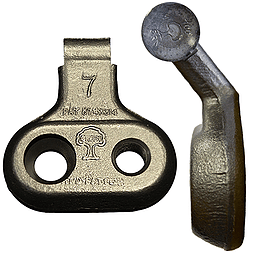
- The Pocket
Also referred to as the “holder”, the LoPro series pockets are an efficient, low profile pocket that the Greenteeth Wearsharp® fit snugly into. Each series of teeth has a corresponding pocket specific to its size. Note: a different series of teeth WILL NOT fit into another pocket. Example: a 900 series tooth WILL NOT fit into a 700 series pocket. - The Tooth
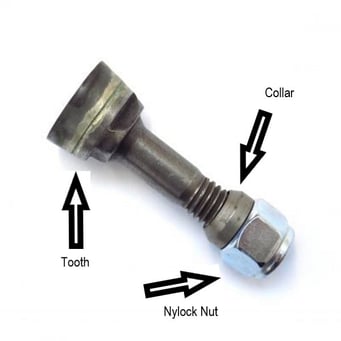
These are the guys that do the hard work. The Wearsharp® tooth is designed with three cutting edges and a patented concave design for increased longevity. - The Collar
The collar, or “spacer”, is positioned opposite to the cutting edge of the tooth. It allows for a snug fit into the holder. Be sure you have reinserted the collars when changing teeth. - The Nut
The teeth are secured by a 5/16-18 nylock nut. The nylon allows for a locking nut without the use of Loctite and provides the ability to change in the field.
- The Pocket
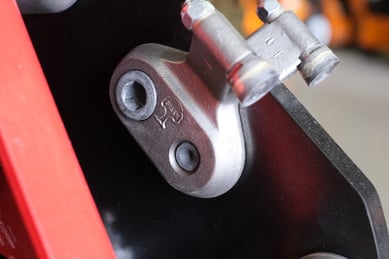
Recognizing Wear and Damage
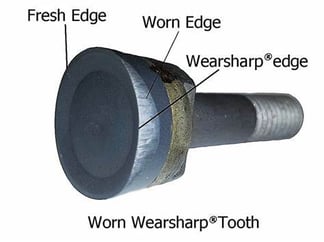 A visual inspection can tell you a lot about the condition of your cutting teeth. Worn teeth will look dull and have a rounded edge. You may see chips in the tooth, or even notice a broken or missing tooth in extreme cases. If you see missing teeth or broken pockets, Immediately replace these parts. As this can cause premature wear to bearings and other essential parts.
(back to top)
Rotating the Teeth
Follow these simple steps to rotate your Greenteeth Wearsharp® cutter teeth. The following instructions will be the same across all series sizes:
- Using the appropriate sized wrench (see above), loosen the Nylock nut that secures the tooth into the holder (you do not need to remove the nut completely).
- Tap the tooth down enough that the tooth is free from it’s seat and can be rotated.
- Rotate the tooth a third of a turn.
- Reposition the tooth in it’s seat. The teeth are designed to rotate in thirds and should fit snugly back into the holder.
- Retighten the Nylock nut to proper torque specifications (see below for Greenteeth Wearsharp® torque specs).
Replacing the Teeth
To replace the tooth, follow the same instructions to rotate the tooth, and simply replace the worn tooth with a new one.
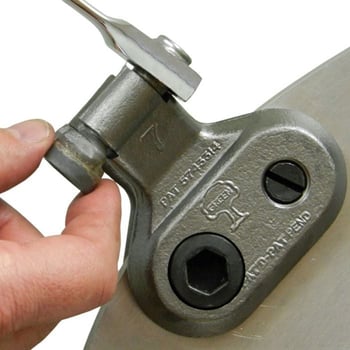
Replacing the Pockets
 The pockets for Greenteeth LoPro® are simple to replace, though it is necessary to make sure they are secure and may require some extra effort. We do not recommend replacing pockets in the field.
- Using the ½ hex drive, remove the LoPro bolts from each side of the pocket.
- This may require the use of a heat gun to loosen the bolt.
- Remove the pocket and replace it with a new pocket. Using a dab of Red Loctite on the threading.
- Tighten the LoPro bolt to designated torque specs.
- Due to the wear these parts are subjected to, we recommend replacing both LoPro bolts and pockets together.
Tooth Configuration
 We recommend an alternating pattern of straight and angled pairs of teeth on your cutting wheel for optimum performance.
Torque Specifications
500 Series Wearsharp® - 20ft lbs
700 Series Wearsharp® - 20ft lbs
900 Series Wearsharp® - 35ft lbs
LoPro® Pockets (all series) - 180ft lbs
For more torque specs check out the Greenteeth® FAQ Page.
As always, if you have any questions, feel free to call our service department at 1-800-525-7348.
This post was originally published in September 2021 and has been refreshed and updated.