
Innovative Equipment Engineered to Last
Discover Barreto Manufacturing's 40 years of innovative, durable landscaping equipment, along with expert tips and local highlights for your projects.

Sod is a quick and efficient way to improve the look of your lawn, without waiting for seed to grow.
Read First: How to Choose the Right Tiller
4 Steps to Installing Sod:
Gather Your Supplies
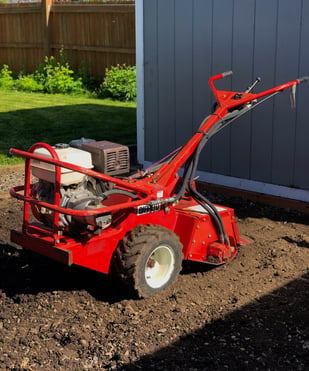
- Tiller or Sod Cutter
- When breaking through existing sod or tough soil, a rear tine tiller is recommended. If seeking to remove the grass all together, use a sod cutter.
- Rake
- Topsoil (optional)
- Fertilizer (optional)
- Consult your sod supplier for information regarding the best fertilizer for your sod variety
- Sod
- Check out this article for tips on choosing the appropriate sod: Types of Sod
- Lawn Roller
Preparing the Area
 Being unprepared is one of the major mistakes that leads to improper sod installation. Once sod has been cut, it has an extremely short lifespan. Misting the sod may increase the lifespan before installation. Under ideal conditions your sod may last around 2-3 days, and it should still be installed as soon as possible to ensure maximum healthiness. Be aware that in hot and dry conditions the sod may only last around 10-12 hours.
New sod will need a prepared soil depth of six inches. With a rear tine tiller you are likely to achieve this in the first pass. In extreme soil conditions (excessive hardness or rockiness), you may need to till multiple passes, increasing the depth with each pass. Till the area and remove any large rocks or debris from the soil. You will want to remove any large clumps of grass as well (the size of a baseball or larger). Once you have cleared the soil, check your depth and, if necessary, till another pass. Then rake the prepared area smooth and level.
While not a necessary step, the addition of topsoil can be beneficial to establishing your new sod. For this application, you will want to mix the topsoil in with the first few inches of soil. Neglecting to do this may prevent your sod from establishing a deep root system. Additionally, you may also want to apply a starter fertilizer to your soil. Apply this to the soil before laying your sod.
Installing the New Sod
Before laying the new sod, ensure your soil is properly moistened. In some areas and weather conditions, this may mean watering for about 24 hours before installation. Start by laying your sod against the longest edge of your area in a staggered pattern as opposed to a grid. Not only is this aesthetically superior, but will also prevent water from washing the area out. It will also make it more difficult for nearby critters to pull up the edges since new sod and soil are ideal living conditions for their favorite grubs! Be sure to place the pieces as close to each other as possible without overlapping. Cover any exposed edges with a layer of soil to prevent drying. Once you have placed all your sod, put your lawn roller to work and roll in both directions across the sod to remove any air pockets and ensure proper contact with the soil.
Establishing and Continued Care
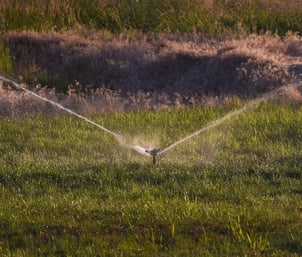
In order for your new lawn to thrive, you will need to be diligent about watering. For the first 2-3 weeks, or until the sod has become well rooted, you will need to water long enough to moisten both the sod AND the soil beneath it every day. Once the root system has been established, you can decrease the amount of water to the lawn, while still watering enough to supplement rainfall in your area. You will want to limit traffic on your new lawn for at least the first month. The longer you give your sod to establish, the more resistant it will be when in full health.
For the following year or two (or at least through your new lawn’s first summer), you will need to monitor it closely. A new lawn will need extra water and care to ensure it’s healthy and hardy future.

Remember to always call 811 before you dig and locate all underground utilities. While tillers generally run at depths of 6-8 inches, multiple tilling passes, or improperly buried lines can pose a safety hazard on your jobsite.
This post was originally published in August 2020 and has been refreshed and updated.